Installing PiBakery on Mac
1. Download PiBakery
The first step to installing PiBakery on Mac is to download the installer. (FR1, FR2, CA1 mirrors)
Keep in mind that this download contains the full operating system for Raspberry Pi, and is therefore a large file, which can take a while to download depending on the speed of your internet connection.
2. Open Installer
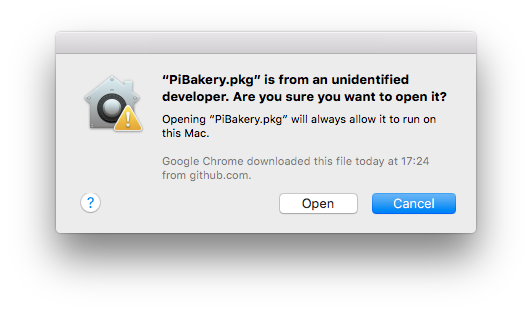
Once the PiBakery installer has finished downloading, you need to install it. However, if you simply double click the PiBakery.pkg file, you'll be presented with a window telling you that "PiBakery.pkg" can't be opened because it is from an unidentified developer.. This message appears because I have not registered to be an Apple Developer, as it costs £100 per year.

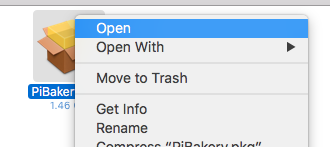
To get round this security precution, all you need to do is right-click on PiBakery.pkg and then click Open. You'll still be presented with a warning telling you PiBakery is from an unidentified developer, but this time you'll be given the option to open it anyway.
In the window that comes up, choose Open.
3. Install PiBakery
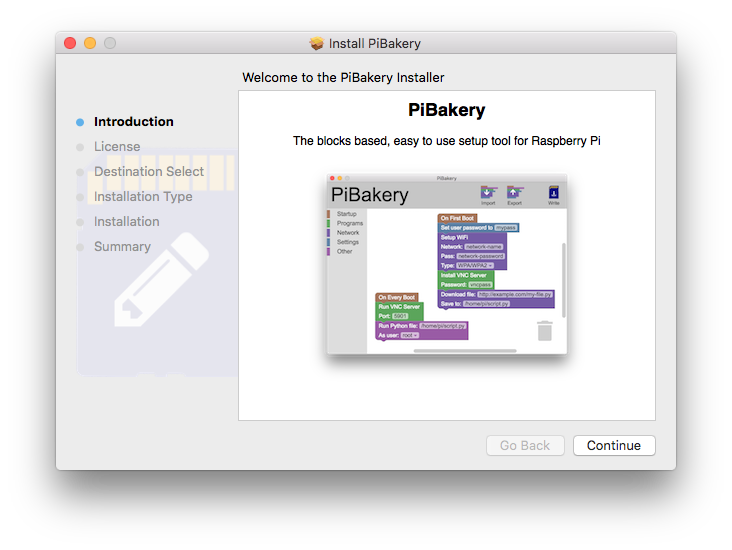
Once you've opened the PiBakery installer, you'll need to click through the different screens, accepting the license agreement, and typing in your administrator password.
PiBakery will then install on your Mac. This usually takes under two minutes to complete, at which point the installer will tell you that everything was installed successfully. You can then close the installer.
4. Open PiBakery
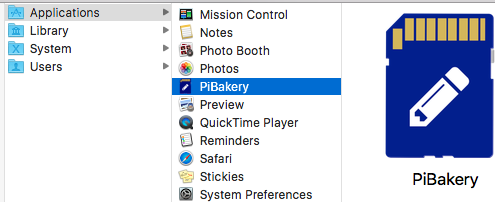
Now that you've installed PiBakery, you can start using it. In your Applications folder, you'll see a new app, PiBakery. To open it, double click it as normal.
The first time that PiBakery is run there is a small possibility that it may tell you that there is an update available. This update is optional and if you choose not to update, you'll be asked again the next PiBakery starts.
And that's it! PiBakery is ready for you to use!